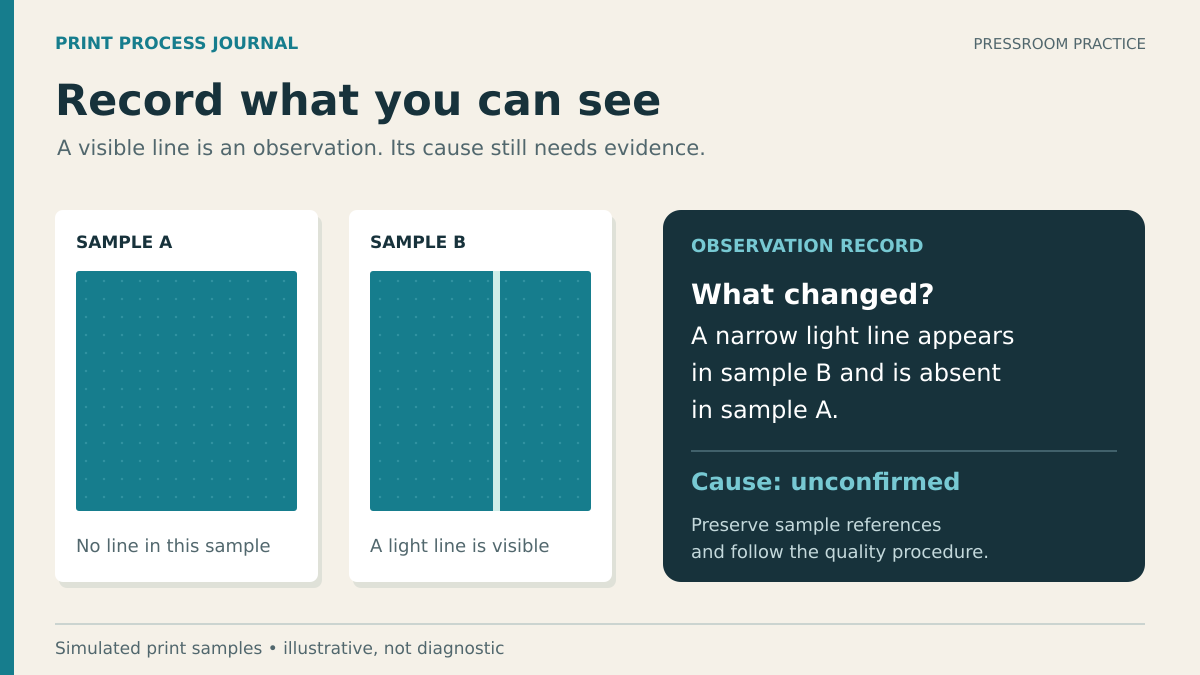
A streak appears in a printed sample. Someone suspects the blade, someone else suspects the ink, and the next proposed adjustment is already being discussed. Before the explanations become competing certainties, capture what happened. A concise defect log helps the production team separate an observed symptom from a possible cause.
The purpose is to support the site’s approved troubleshooting process. A log cannot diagnose equipment by itself, and this article does not prescribe pressure settings, cleaning chemistry, or mechanical adjustments. It gives the people responsible for those decisions a clearer record to work from.
Make the situation safe before investigating
Use the site’s response procedure when a defect, leak, or suspected equipment problem appears. Only authorized personnel should inspect or service the machine, following the OEM instructions and applicable energy-control procedures. OSHA explains that unexpected startup or released stored energy can injure people during maintenance. A stopped machine is not, by itself, proof that every hazard has been controlled.
Gather information from approved controls, production records, and safely obtained samples. Do not reach toward a moving roll, bypass a guard, or handle a blade to collect evidence. If the proposed observation cannot be made safely within the site’s procedure, leave it for the qualified person responsible.
Write the symptom before the explanation
“Blade failure” is a conclusion. “A narrow light line is visible at the same cross-web position in the retained samples” is an observation. The second statement gives another person something to inspect without requiring them to accept a diagnosis first.
Harper’s anilox-scoring guide provides a useful example: a light line can be associated with scoring, but plugged cells can also produce a light streak. Similar appearances can have different explanations. Preserve that uncertainty in the record until an appropriate inspection establishes more.
Describe the affected color or station, where the mark appears, whether it is continuous or intermittent, and when it was first noticed. Use the same reference edge or coordinate convention the production team normally uses. If a detail is unknown, mark it unknown rather than estimating it from memory.
Create a timeline of the job
A result becomes easier to interpret when it is connected to time. Record whether the problem was present at startup, emerged during the run, or followed a known event. List recent changes without treating the most recent one as automatically responsible.
Allison’s blade-analysis form asks about press speed, the ink or coating, cylinder type, blade materials, operating time, when the issue developed, and recent process changes. Those categories are a useful starting point for a local record. Include measurement units and identifiers so someone outside the shift can understand the entries.
Keep the timeline short enough to maintain during a real production day. A few dated observations are more useful than a long retrospective story that merges several events. Where a control setting is available in the press record, reference that record instead of retyping an uncertain number.
Use an observation-and-action record
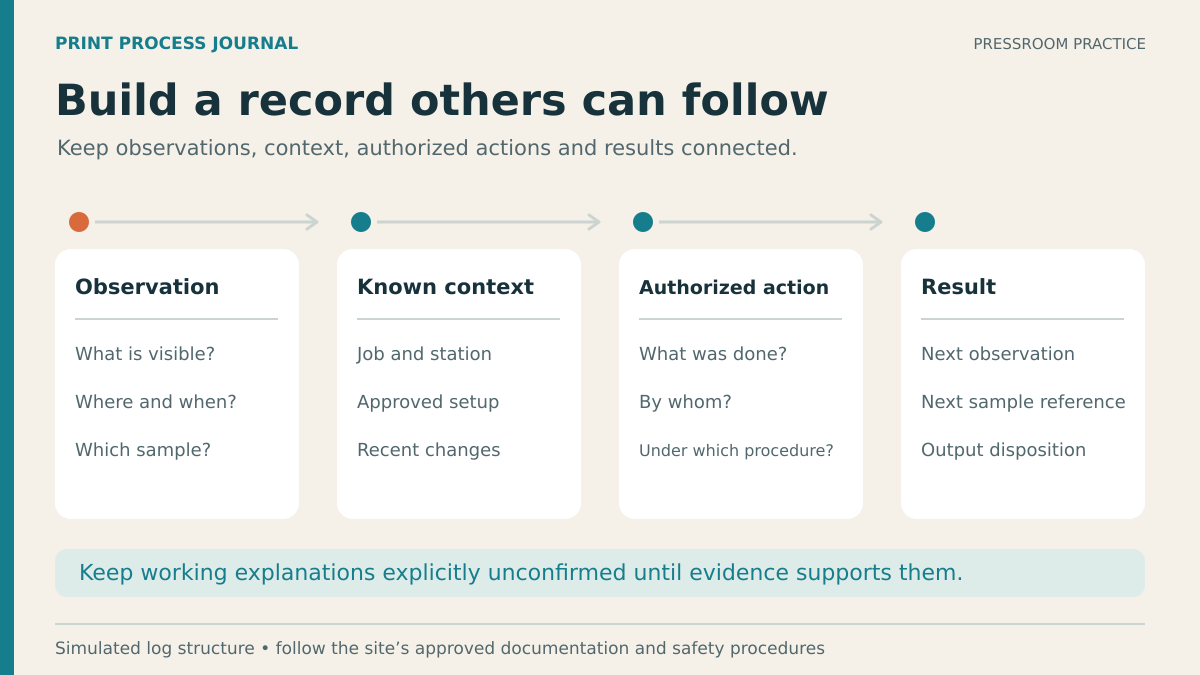
The following fields can be added to an existing job sheet or quality record. They are an editorial organizing tool, not a replacement for the site’s approved documentation.
- Identification: job, press, station, sample reference, date, and time.
- Observation: what is visible, where it appears, and how often it occurs.
- Known context: approved setup, current materials, and relevant recent changes.
- Working explanation: the possibility being investigated, clearly marked as unconfirmed.
- Authorized action: what was done, by whom, and under which procedure.
- Result: the next observation, sample reference, and disposition of affected output.
A hypothetical entry might read: “Light line first seen in sample B, station three; absent in sample A. Cause unconfirmed. Production lead notified; affected output handled through the quality procedure.” It is intentionally restrained. It records evidence and the immediate response without pretending the component-level cause is already known.
Keep pressure changes in context
Increasing pressure may feel like a direct response to an imperfect wipe or leak. Harper’s scoring guide describes how excessive blade loading can change the wear pattern and generate larger metal slivers that threaten the anilox surface. That makes pressure a controlled setup variable, not a general-purpose remedy.
Harper’s discussion of anilox and chamber performance also connects reliable operation with alignment, end-seal condition, and maintenance, and advises beginning with OEM-recommended settings. If a chamber is leaking, record where and when the leak occurs, then let the authorized team investigate the assembly under its established procedure.
There is no useful universal pressure number to insert into this log. Record the approved setting or reference document and any authorized change. Include the reason for that change and the observed result. This preserves the difference between a deliberate test and an undocumented adjustment.
Preserve evidence for the people who can use it
Keep sample labels consistent with the job record. If a removed blade or other component may need specialist analysis, ask the supplier how to preserve and package it safely. Allison warns in its analysis instructions that cleaning a worn blade can alter features needed for evaluation. Follow the supplier’s guidance and the site’s handling rules; do not improvise sample preparation.
When contacting technical support, send the concise timeline, relevant specifications, and identified samples or images through an approved channel. Separate confirmed facts from suspected causes. State the question you want answered, such as whether the wear evidence supports a particular explanation, rather than asking the supplier to infer the entire production history.
Close the record with an outcome
After the authorized team resolves or contains the problem, record what was established, what changed, and what remains uncertain. If several actions occurred together, say so. Note any follow-up assigned through the site’s maintenance or quality process.
A good defect log makes the next conversation shorter and more precise. It preserves the observations that would otherwise disappear between shifts, supports careful decisions, and helps a recurring problem be recognized without turning yesterday’s assumption into today’s accepted fact.
Related equipment demonstration
TRESU demonstrates its E-Line chamber doctor-blade holder and blade exchange. This vendor-specific example helps identify the assembly being discussed in a job record. It is not a diagnostic guide or a substitute for your equipment’s instructions, training, or energy-control procedure.
Watch on YouTube: TRESU E-Line chamber doctor-blade demonstration
Leave a Reply